Licensed & Insured — NJ HIC #13VH13359900
njgoldstarconstruction@yahoo.com · 24/7 Emergency · (862) 271-1225

Siding Installation in Bergen County, NJ
Full siding installation and re-siding in vinyl or fiber cement, including tear-off, water-resistive barrier, window and door flashing, and new trim.
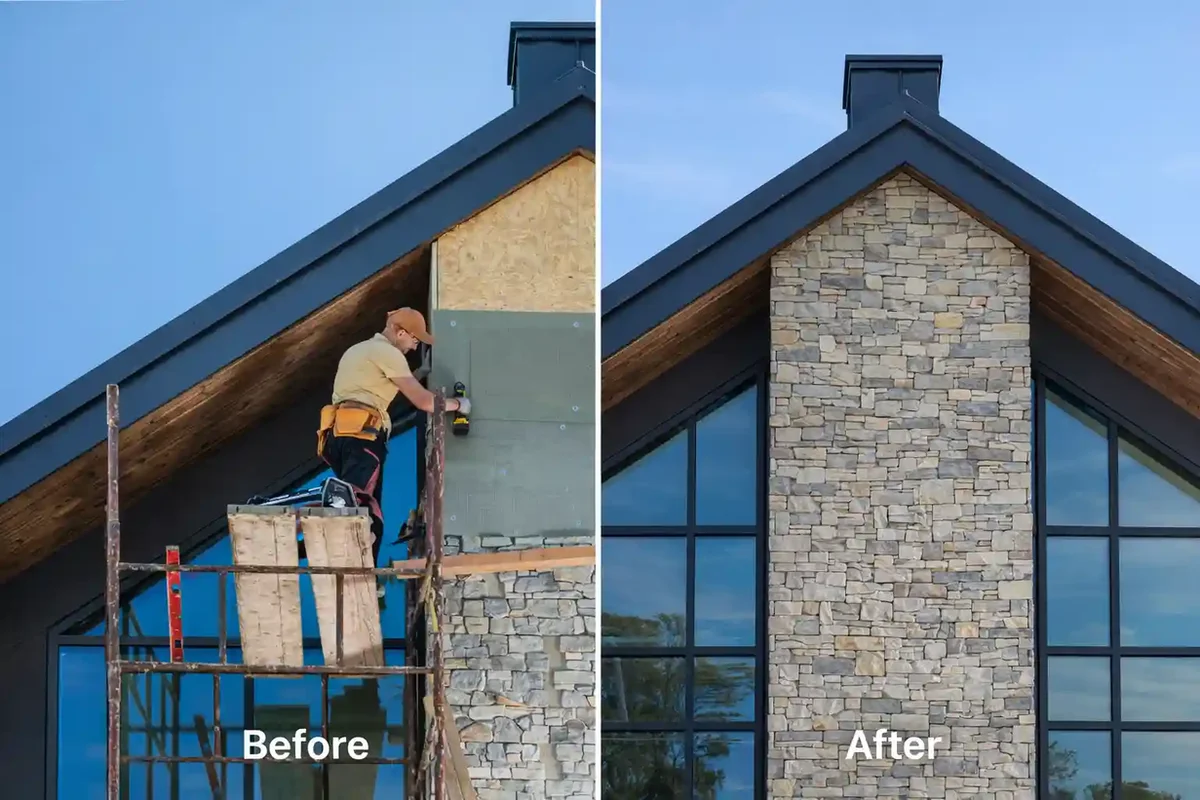
A re-side is the one chance to fix what is behind the wall. We inspect sheathing during tear-off and correct flashing at every opening before the new panel goes on.
This is one part of the siding work we do across Bergen and Passaic County. Every job is quoted in writing after a hands-on inspection, performed by our own crew rather than subcontractors, and backed by our satisfaction guarantee. We are licensed under NJ HIC #13VH13359900 and fully insured.
What the work includes
- Tear-off and sheathing inspection
- House wrap with taped seams and flashed openings
- Insulated vinyl and fiber cement systems
- New corners, trim, soffit and fascia
Tear-off or install over the existing wall: how we decide
A full tear-off removes the old siding so the sheathing and framing can be inspected and any damage corrected before new siding goes on; installing new siding over an existing layer is faster and cheaper but hides that inspection. We recommend tear-off whenever the existing wall shows any sign of past water intrusion, and it is required once the old material is too damaged to serve as a base.
Covering old siding with new panels can work on a sound wall with a flat, stable surface, and it avoids the mess of demolition. But it also means whatever is happening behind the old siding — soft sheathing, a missing or torn wrap, a flashing gap at a window — stays hidden for many more years. We only recommend it when the existing wall is dry, flat and free of rot, and even then we prefer to open at least a section to confirm.
Tear-off is the default on most of the re-sides we do across Bergen and Passaic County, because it is the one chance to see and correct what is actually behind the wall rather than guess. It also lets us reset window and door flashing to current practice instead of building around decades-old shortcuts.
What a sheathing inspection turns up once the old siding is off
Once old siding comes off, we check the sheathing for soft spots, delamination, staining that traces to a past leak, and any framing exposed to moisture behind failed flashing. Soft or rotted sheathing gets replaced before the new wrap goes on; a wall that looks fine from the outside can still hide years of slow water damage at a single window or corner.
The sheathing inspection is where a re-side pays for itself. A stained sheet, a soft spot underfoot pressure, or fasteners that pull out too easily all point to water that has been getting in longer than anyone upstairs noticed. We mark and photograph anything we find, replace damaged sheathing panel by panel rather than patching over it, and check the framing behind it for the same signs before closing the wall back up.
What we look for, section by section
- Delamination or softness at the base of the wall, where splash-back and grade contact do the most damage.
- Staining radiating out from window and door openings, which usually points to a flashing failure at that exact spot.
- Gaps or tears in the old wrap where fasteners, vents or a satellite mount went through it without being resealed.
How house wrap gets lapped and tied into window and door flashing
House wrap is installed shingle-style, starting at the bottom of the wall so each course laps over the one below it, and every seam is taped or sealed. Window and door flashing is then integrated into that wrap in sequence — sill pan first, then side flashing, then a head flashing that laps over the wrap above the opening — so water sheds outward at every layer.
Sequence is everything here. The house wrap goes on first, working up the wall so upper courses always cover lower ones, the way roofing shingles work. At each window and door, we install a sill pan to catch and direct any water that gets past the frame, flash the sides, then finish with a head flashing that tucks under the wrap above the opening rather than sitting on top of it. Get that order backward and water that reaches the flashing gets directed straight into the wall instead of back out.
Corners, wall-to-roof intersections and any wall penetration — a hose bib, a light fixture, a deck ledger — get the same shingle-lap treatment before the siding panel ever goes on.
Trim, corners and finish details that keep the whole wall watertight
Trim boards, corner posts and J-channel are installed with the same clearances and fastening rules as the field panels, because a tight corner or an over-driven trim nail creates the same buckling and water-entry risk as a mis-fastened panel. Outside corners get flashed the same as any other wall transition, and trim is set with a small gap for material movement, not caulked rigid against the framing.
Corners and trim take more direct weather than the flat field of the wall, so we treat them as their own detail rather than an afterthought. Corner posts and J-channel get fastened the same way as the panels — centered in the nailing slot, not driven tight — so they can move with temperature the same way the rest of the wall does. Where trim meets a roof edge, a deck rim, or a masonry chimney chase, we flash that transition the same way we flash a window head.
Fiber cement trim is fastened and caulked to the manufacturer’s published instructions, since the material has different fastener and clearance requirements than vinyl trim. Vinyl accessories follow the same shingle-lap and nail-hem logic as the field siding.
Why we install to the manufacturer's instructions, not just the code minimum
Vinyl and fiber cement siding are both installed to published manufacturer instructions in addition to the building code, because warranty coverage and wind performance depend on details the code alone does not specify, such as fastener spacing, minimum clearance from grade and roof surfaces, and how butt joints are sealed. Skipping those details can void coverage even when the wall still looks fine.
The Vinyl Siding Institute’s installation manual, based in part on ASTM D4756, sets out the fastening, lapping and clearance details that keep a vinyl wall performing the way it is designed to. Fiber cement manufacturers publish their own instructions covering fastener type and spacing, minimum clearance between the bottom of the siding and grade, roofing, decks and other horizontal surfaces, and how butt joints are caulked or flashed. We follow the published instructions for whichever material is going on the wall, not a generic approach applied to both.
Permits and what to expect from first call to finished wall
A siding installation project with NJ Gold Star Construction starts with a call or text to (862) 271-1225, an on-site inspection, a free itemized written estimate, the scheduled tear-off and installation by our own crew, and a cleanup and walk-through before we leave. Whether your job needs a construction permit depends on its scope and your municipality; we confirm that before work starts.
Homeowners across Bergen and Passaic County have told us the process itself is what stood out. As one put it after a project managed start to finish by our crew: “the communication, the time line to complete the job was done… His crew was very clean organized and respectful.” — Doris C., Google review.
We install siding from Fair Lawn to Paramus. A re-side is also a good time to address foundation drainage or an aging roof if either shows up during the inspection. Our guide to siding repair costs explains what drives the number on a smaller job, and the real figure for a full install comes from a free written estimate.
Call or text
Tell us what you are seeing — cracked panels, a wall you want re-sided, or a home you are updating before sale.
Inspection
We walk the exterior, check for signs of water damage, and discuss tear-off versus install-over for your wall.
Written estimate
An itemized scope naming the material, wrap, flashing approach and trim work, plus whether a permit applies.
The work
Tear-off, sheathing repair where needed, new wrap and flashing, then siding, trim and corners by our own crew.
Cleanup and walk-through
Debris and old siding are hauled away and we review the finished wall with you before we consider the job done.
Related siding services
Siding repair for cracked, loose or storm-damaged panels — matched to the existing profile where…
Frequently asked questions
How long does a re-side take?
A typical Bergen County home takes one to two weeks depending on size, material and how much sheathing repair is needed.
Does new siding add insulation?
Insulated vinyl and added foam sheathing improve wall performance modestly. The bigger gain is stopping air and water infiltration.
Do I need a permit for a siding installation in New Jersey?
It depends on the scope of the work and your municipality. Some siding replacement on one- and two-family homes is treated as maintenance, while larger-scope work can require a construction permit under New Jersey’s Uniform Construction Code. We confirm the requirement with your local construction office as part of the estimate, rather than assuming either way.
Can you match new siding to the existing color and profile?
We try, but exact matches are not guaranteed on an older home, since manufacturers retire colors and profiles over time. When a close match exists we use it; when it does not, a full re-side of that wall or elevation is usually the better path so the finished result is uniform rather than a visible patch.
How long does a full siding installation take?
Most single-family re-sides take several days to about two weeks depending on the size of the house, whether extensive sheathing repair is needed, and weather. We give a specific timeline in the written estimate once we know the scope, including tear-off, any sheathing replacement, and trim and corner work.
Do you install siding over brick or masonry walls?
Yes, with furring strips installed first to create a flat, fastenable surface and an air gap behind the siding. The house wrap and flashing details still apply over furring the same way they do over standard wood-framed walls, and the approach is confirmed during the on-site inspection.
- Vinyl Siding Installation Manual — Vinyl Siding Institute / Polymeric Exteriors
- Fiber-Cement Siding — UpCodes (building code reference)
- Renovation, Repair and Painting Program: Work Practices — U.S. Environmental Protection Agency
Updated September 2026 · Reviewed by Edgar Lopez Gonzalez, owner · NJ HIC #13VH13359900
Licensed & insured. 25+ years in North Jersey. We answer 24/7 for leaks and storm damage.
- Service
- Siding Installation
- Category
- Siding
- Service area
- Bergen & Passaic County and surrounding North Jersey
- License
- NJ HIC #13VH13359900