
Short answer: Most New Jersey roof leaks trace to flashing at chimneys, sidewalls and skylights, cracked pipe boot collars, failed valley metal, or winter ice dams, not worn-out shingles in the open field. Diagnosis matters more than the fix: water tracks along framing before it stains a ceiling, so the visible spot is rarely the entry point. Attic inspection is DIY-safe; roof-level diagnosis and repair generally isn’t.
Why Roof Leaks Are Rarely Where They Appear
Water entering a roof travels along the underside of the sheathing and down rafters before it soaks through insulation and drywall, so a ceiling stain is often several feet from the actual entry point. Diagnosing a leak means tracing that path back to the roof, not just patching the spot where the damage became visible.
This is the single most useful thing to understand before attempting to fix a leak yourself: the stain on your ceiling tells you where water pooled, not where it got in. Gravity and the slope of the rafters carry water sideways and downhill along the wood before it finds a low point to soak through.
That’s why a leak that shows up over a bedroom closet might actually originate at a chimney flashing detail ten feet away. A proper diagnosis starts in the attic, tracing staining and moisture back toward the roof deck, rather than starting with a tube of sealant at the spot on the ceiling.
Flashing Leaks: Chimneys, Sidewalls and Roof-to-Wall Joints
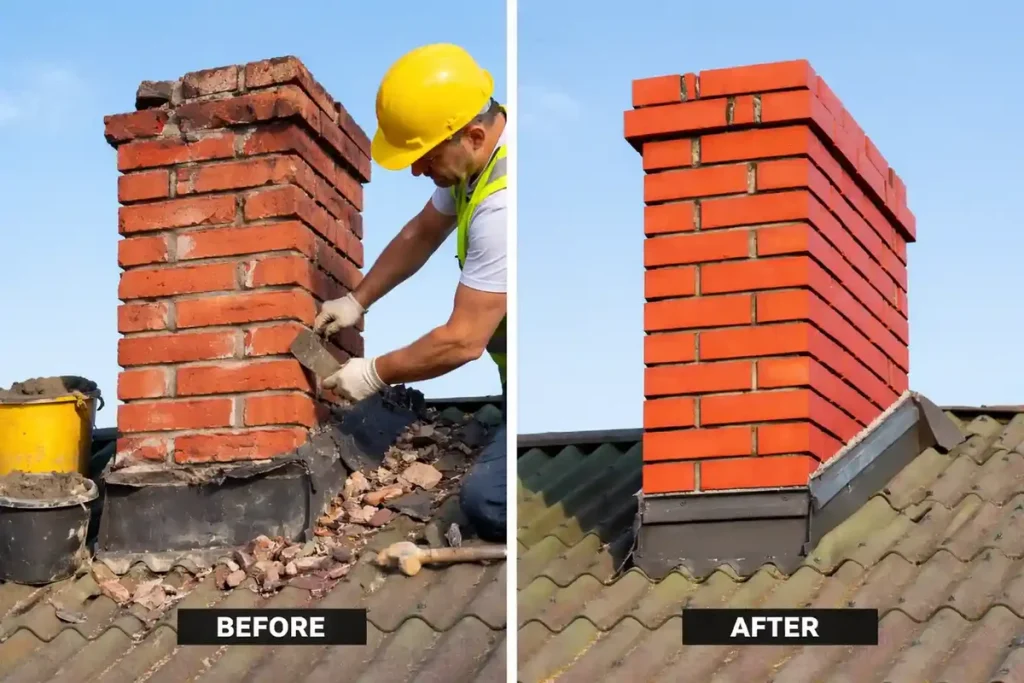
Flashing at chimneys, sidewalls and any place a roof meets a vertical wall is a leading source of leaks because it does the hardest job on the roof, sealing a joint rather than shedding water down an open slope. A chimney wide enough to need a cricket that never got one is a especially common failure point.
According to the National Roofing Contractors Association, flashing prevents water entry at every junction where roofing meets a wall, skylight, chimney or other penetration, and without it, a roof would leak like a sieve. That’s precisely why these details fail before the shingle field around them does.
A chimney’s counterflashing, step flashing along a dormer or addition wall, and roof-to-wall joints on an add-on room are the specific places we check first on any leak call. See our chimney repair page for how we handle flashing tied directly to chimney work.
Pipe Boots and Roof Penetrations: The Small Leak Everyone Misses
The rubber collar on a plumbing vent pipe boot cracks from UV exposure years before the surrounding shingles show any wear, making it one of the most common sources of a slow, hard-to-notice leak. Every pipe, vent stack and roof-mounted fixture is a penetration that depends on that collar staying intact.
A pipe boot is a small, unglamorous part of the roof, and that’s exactly why it gets overlooked. The rubber or plastic collar that seals around a vent pipe degrades faster than the asphalt shingles around it, since it’s exposed to direct sun on a smaller, more UV-vulnerable profile.
A cracked boot rarely causes a dramatic leak. It causes a slow one, often noticed first as a musty smell or a small stain that seems to appear and disappear with the weather, which makes it a common cause of leaks that get mistaken for something more complicated.
Valley Leaks: Where Two Roof Planes Meet
A roof valley concentrates the water from two entire roof planes into one narrow channel, so any failure in the valley metal or the shingle nailing pattern crossing it produces a leak faster than a similar failure elsewhere on the roof. Valleys also collect leaves and debris, which can dam water and force it under the shingles.
Valleys do more work per square foot than almost any other part of a roof, which is why they’re a recurring leak source. Metal valley flashing that’s corroded, or shingles nailed too close to the valley’s centerline, both compromise the same channel that’s already handling twice the water volume of an open slope.
Debris buildup makes this worse. Leaves and grit collecting in a valley can dam the flow during a heavy storm, backing water up and under the shingle edges rather than letting it run straight down. Keeping gutters and valleys clear during routine service is a simple way to reduce this risk.
Skylight Leaks: Factory Kit vs. Sealant Failure
Most skylights come with a factory-engineered flashing kit designed to shed water around the curb, and the kit is generally reliable; what fails over time is the sealant and fasteners around it, not the kit’s design. A skylight leak often means the flashing kit needs to be reset or replaced, not just resealed.
Skylights get blamed for leaks that are actually happening at the flashing kit around them rather than at the glass or frame itself. The kit is built to handle water at that penetration, but the sealant holding pieces of it together, and the fasteners securing it to the deck, both age and loosen over years of sun and temperature swings.
A leak that shows up at a skylight after a specific storm, rather than gradually, often points to a fastener or a sealant joint that finally let go rather than a design flaw in the skylight itself.
Ice Dams: Why Northern New Jersey Roofs Get Them
An ice dam forms when heat escaping into the attic melts snow on the upper roof, and that meltwater refreezes at the colder eaves, building a ridge of ice that backs water up under the shingles. New Jersey’s building code requires an ice barrier membrane at the eaves specifically to give water somewhere to go when this happens.
Ice dams are a heat-loss problem before they’re a roofing problem. Warm air leaking into the attic from below melts snow on the upper roof even while the eaves, which overhang unheated space, stay cold. That meltwater refreezes right at the edge, and the dam that builds up forces subsequent meltwater to pool and work backward under the shingles instead of running off.
New Jersey’s adopted building code requires an ice barrier membrane extending at least 24 inches inside the exterior wall line in the state’s colder zones, precisely because ice damming is a known regional risk. That membrane doesn’t stop ice dams from forming, but it seals around the nail penetrations in that zone so backed-up water has a harder time finding a way in. Balanced attic insulation and ventilation, covered on our attic ventilation page, is the actual prevention; the ice barrier is the code-required backstop.
What’s DIY-Safe to Check, and What Isn’t
Checking the attic for staining, daylight or a musty smell is safe for most homeowners to do themselves. Getting on a ladder to inspect the roof surface, or walking the roof itself, carries real fall risk and is where we’d tell most homeowners to stop and call a professional instead.
The safe, useful thing any homeowner can do is walk the attic with a flashlight after a dry stretch and look for staining, damp insulation or daylight coming through the deck. That’s real diagnostic information and it costs nothing but time.
Ladder and roof work is a different category of risk. If you do use a ladder to look at gutters or eaves from the outside, the National Institute for Occupational Safety and Health recommends setting an extension ladder at roughly a 75-degree angle, and the Consumer Product Safety Commission separately warns against using a ladder anywhere near overhead power lines. Beyond that kind of ground-level check, diagnosing and repairing the roof itself is not a DIY project we’d recommend; a fall from a roof or a ladder is a serious injury risk that isn’t worth the cost of a professional inspection.
How We Diagnose and Fix a Leak
Our process starts with the attic, not the roof surface, tracing staining and moisture back toward its likely source before we ever get on a ladder. Once we’ve narrowed the entry point, we repair that specific detail, whether it’s flashing, a pipe boot or a valley, rather than blanket-coating the roof or replacing shingles that were never the problem.
If you’re seeing signs of a leak, don’t wait for it to get worse. Request a free written estimate and we’ll get someone out to trace it properly, or see our roof repair page for how we handle repairs once the cause is confirmed.
- Trace the leak from the attic. We look for staining, moisture patterns and daylight to narrow down where on the roof the water is actually entering, before assuming the ceiling stain marks the spot.
- Inspect the specific roof detail. Once we have a likely area, we check flashing, pipe boots, valley metal and the shingle nailing pattern at that location for the actual point of failure.
- Repair the detail and document it. We fix the specific cause, not just the symptom, and give you a written estimate that names what was found and what was repaired.
Frequently asked questions
Can I use roof sealant or caulk to stop a leak myself?
A tube of sealant over a visible crack can slow a leak temporarily but rarely fixes the actual cause, and it can make diagnosis harder later by hiding the original failure point. It also means getting on the roof, which carries real fall risk. We’d recommend a professional diagnosis before any repair, temporary or permanent.
How do I know if a leak is from the roof or from condensation?
Condensation tends to appear as widespread dampness on cold surfaces like metal vents or nail tips, especially in winter, while a roof leak usually traces to one specific area tied to a storm or snowmelt event. If the moisture pattern doesn’t match recent weather, poor attic ventilation is worth checking as the cause.
Why does my roof only leak during heavy wind-driven rain?
Wind-driven rain can push water sideways or slightly uphill against flashing and shingle laps that shed water fine under normal, vertical rainfall. A leak that only shows up in wind-driven storms often points to a flashing detail or shingle lap that needs wind, not just rain, to expose the gap.
Do gutters cause roof leaks if they’re clogged?
Clogged gutters don’t leak the roof directly, but backed-up water can work up under the first course of shingles at the eave during a heavy storm, and in winter they contribute to ice dam formation. Keeping gutters clear reduces both risks.
Is it normal for a roof to leak only in winter?
Yes, if the pattern points to an ice dam rather than a flashing or shingle failure. Ice dams only form when snow melts on a warmer upper roof and refreezes at a colder eave, so a leak that appears specifically after snow rather than rain is a strong sign of that mechanism.
How urgent is a small, slow leak compared to an active one?
Still urgent. A slow leak wets insulation and framing just as an active one does, only more gradually, which means the damage is easier to underestimate. We prioritize active leaks for same-day tarping, but a slow leak should still be scheduled for diagnosis promptly rather than monitored indefinitely.
Sources
- Flashing and Vents (Roof Builders Handbook) — National Roofing Contractors Association
- Chapter 9 Roof Assemblies: New Jersey UCC One- & Two-Family Dwelling Subcode — UpCodes (New Jersey edition of the 2021 IRC)
- NIOSH Ladder Safety — National Institute for Occupational Safety and Health (CDC)
- Ladders and Electricity Don’t Mix — U.S. Consumer Product Safety Commission
- Overview of the Climate of New Jersey — Office of the New Jersey State Climatologist, Rutgers University
Have a question about your own home? Call (862) 271-1225 or request a free written estimate.